My Reaction To : Microsoft Buying Minecraft

Since 2009, Minecraft has been one of the most popular games in the industry. Many theorists are trying to figure out how this simple game of blocks and survival took such a fly. However, you can be sure that it did, otherwise Microsoft would never have taken interest in Minecraft!

About a month ago (September 15, 2014), Microsoft finalized the deal with Mojang, not only to buy Minecraft, but Mojang itself. Many loyal Minecrafters have been pretty paranoid about this, and are dying for an explanation. Well, I am about to bring you all the facts, taken straight from Mojang’s website themselves. We will be covering some important details like Why Notch Had Sold, Why Microsoft Bought, and What That Means For You. So let’s get started!

Why Notch Had Sold: Probably the most asked question out of all of them. Everyone is wondering why Notch sold Minecraft in the first place. Did he think they would develop it better? Did he just get offended by one of the members? Well, according to Notch, he had began to get bored with Minecraft. Minecraft was supposed to be a small project that was not really serious, it was NEVER supposed to take off like it did. It is now such a big project, that Notch had no time for developing any other games or really doing anything else, stuff that he wanted to do. So, he sold Minecraft in an effort to get rid of the huge load on his shoulders, and start developing other games that he enjoyed.

Why Microsoft Bought: There are many reasons for this, though one of the main would have probably been how much Minecraft is gaining in popularity. Microsoft bought Minecraft to use this flow to their advantage, because of the amount of money they could make of of it, seeing as currently Minecraft has more than 11 million players! And just think, each one of these players payed $27 to buy the game, and when you do the math, you get Minecraft at having earned more than $297,000,000! No wonder Microsoft would buy! Also, they want to put the game into their store, so that more people will buy PC’s in order to play Minecraft. There is a ton of other motives though, and that is just one of them.

What That Means For You: Depending on where you stand in this ladder, this could mean many things. But one of these are clear, Minecraft will be developed and produced more on Microsoft products than others. Also, it will most likely raise in price by a lot, not suddenly, but slowly overtime to not attract attention. So, if you are like me and play Minecraft on a Mac, you should expect to see better quality on a PC. Also, the Xbox version will be MUCH better than the PS3 version, seeing as Xbox was made by Microsoft.

If this article helped you out at all, be sure to leave a LIKE! If there is anything I missed or that I should add, be sure to leave a COMMENT! And don’t forget to FOLLOW me, I post every Monday! See you guys in another article!

How To : Make All Your Apps Go Full Screen [MAC]

Sometimes, if you are tired of seeing an annoying desktop behind your important application window, or even if you are just looking to make your screen wider so you can record a video, you generally want to make your application full screen. To do this, their is a little double arrow at the top right hand corner, and you would click it. HOWEVER, a BUNCH of applications on the Mac don’t support this, and it is a hassle trying to make it go full screen. I was faced with the same problem, because I wanted to record some Minecraft while easily switching through Skype calls so my viewers could hear their voices. However, the full screen for Minecraft was not supported, and the alternative was just as bad, I could go full screen but not be able to switch through applications. So I did a bit of homework. I looked into different steps and methods, and I discovered a way to make my Minecraft full screen with two FREE items called SIMBL and Maximizer. If you are reading this, you may have the same type of problem, so I have put these steps together in a How-To, aimed directly at those who need help with this.

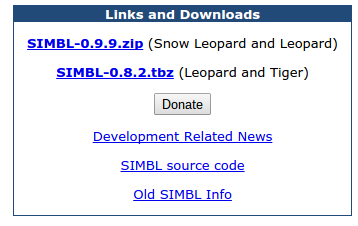
Step 1: The first step is going to be to download both of the applications. You can download SIMBL and Maximizer from the links down here, and after you are done open both of them. Also, use the SIMBL for Snow Leopard and Leopard, it is the easiest and works for all the Mac OS X 10 updates like Lion and Mountain Lion:

http://www.culater.net/software/SIMBL/SIMBL.php

Screenshot 2014-11-11 at 3.02.13 PM

http://chpwn.com/apps/maximizer.html

Screenshot 2014-11-11 at 3.01.44 PM

Step 2: The next step is to open SIMBL. You want to download and install it onto your computer. Once that is done, you are going to open the Maximizer application. In it, there will be a file called Maximizer.bundle. Be sure to drag this to your desktop. One this is done, you are ready to move onto Step 3.

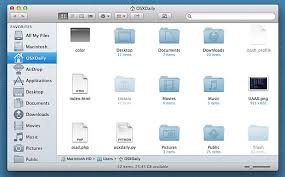
Step 3: Now that you have installed SIMBL, you are going to want to open your Finder, usually located on your dock. Once you are in, press these keyboard controls: CMD + SHIFT + G. After you do that, a pop up will come with the words /folder or /library. You are going to want to change this so that it says this folder: /Library/Application Support/SIMBL/Plugins

finder

Step 4: You are now in the Plugins folder for SIMBL. Remember that Maximizer Bundle that you put in your desktop earlier? Now you are going to drag it into your Plugins folder. After that, you can exit out of Finder, and open up App Store. If it has the two arrows at the right top corner to enlarge, than you have done it correctly! If not, make sure you have the right version of Maximizer.bundle installed, and that you did all the commands correctly.

If this How To helped you guys out at all, be sure to leave a LIKE. Don’t forget to COMMENT if there is anything that I missed, if there was a bug, or you guys need help! Also, be sure to FOLLOW me, I do TechTastic blogs every week, on Mondays! See you guys in another blog!

How To : Download and Use OpenEmu [ALL Video Game System Emulator for Mac] FREE!

I am sure a lot of you gamers out there probably have been wanting a free, and easy to use, emulator to play all your favorite games, such as Pokemon, The Legend Of Zelda, Super Smash Bros, etc. But the problem is you are not able to find the correct way to do it, and what’s worse is that you are on Macintosh, so it is much harder! However, you are in luck, because I will be showing you how to download and use OpenEmu, an emulator that has ALL popular systems loaded on it, and how to get it for FREE! Be warned, this emulator is only for Mac and you cannot use it for Windows, though I might do another tutorial on that. But anyways, let’s get started, and hopefully you will have OpenEmu loaded and working by the end of this tutorial!

Step 1: The first step is to download the app. It is for Mac, and you can download the roms for this emulator from this site too. I will go more in-depth of roms in another tutorial, but basically it is the game that you want to play, like Pokemon FireRed. You are going to scroll down and hit the “Download Now” button. Beware, there are going to be ads that ask you to download now also, but the OpenEmu downloader is a green arrow going into a disk:

http://coolrom.com/emulators/mac/35/OpenEmu.php

Screenshot 2014-11-03 at 4.06.09 PM

Step 2: Now, right after you open the file, it will ask you to install it. You will have to let it install, but when you come across ads be sure to deny them so you can get rid of the threat of AdWare on your computer! Anyways, after you install it you will get an icon showing the OpenEmu logo, and the Applications folder. You want to drag it into your Applications folder, and it will copy there. If you want to, you could also drag it to your dock or desktop for easy access to your game.

Step 3: Now that you have downloaded it, you have to open it. It will ask you to insert a rom, and you can get those from the  CoolRom website I showed you earlier. Now you are able to play! Just import the rom and select the console it uses! You can save or pause the game with buttons on the bottom, and even record a Let’s Play if you want!

That is how you can play games on an emulator for the Mac called OpenEmu. If this tutorial helped you in any way, be sure to leave a LIKE. If there is anything I should fix or add to this tutorial, be sure to tell me in the COMMENTS. Also, don’t forget to FOLLOW me for Tech Related blogs, coming out every Monday! See you guys in another blog!

Don’t forget to watch my Pokemon AshGray Let’s Play, I used OpenEmu to record it!

iPhone 6 vs Samsung GS5 | Which Smartphone Should You Buy?

If you have been saving up some Christmas money, and you are looking to buy yourself a new smartphone, or maybe one for a family member (BEST CHRISTMAS PRESENT EVER!!!), and you cannot decide between an iPhone 6 and a Samsung Galaxy S5, then you have come to the right place! I will be doing another technological VS, and we are going to compare the iPhone 6 and the Samsung GS5, based on these categories: design, speaker, storage, and performance. So let’s get started, and see who wins!

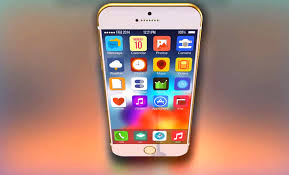
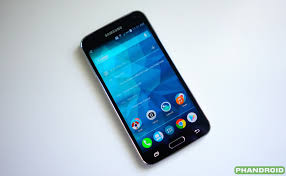
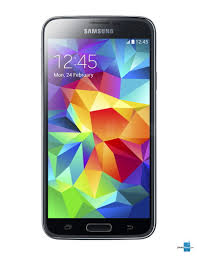
Design: The iPhone 6 is 8.1 mm thick, has a soft plastic back, and is totally water-resistant! On the other had, the Samsung GS5 is 6.9 mm thick, and is all black. The iPhone has a display screen of 1334 x 750, while the Samsung GS5 has a display screen of 1920 x 1080 HD, which is much better for watching videos and playing games. So in this category, I am going to say that the iPhone 6 won, but just barely.

iPhone6

Speaker: You might not call this important, but it is if you need to take a business call or listen to music without headphones. In this category, they both are fairly decent, but here the iPhone has the speaker on the side, while the GS5 has it on the back. For listening to films and TV shows, the iPhone is much more preferable, and is a lot louder. However, when you get it loud enough it gets distorted, while the Samsung GS5 offers much more clarity. The winner for this round is going to have to be the Samsung GS5, mainly because of the clarity, even if it has a bit lower volume. I guess that should encourage you guys to get headphones!

SamsungGS5

Storage: The iPhone 6 comes in three storage models, one with 16 GB, one with 64 GB, and one with 128 GB. However, the Samsung GS5 comes in only 16 GB, but has a microSD card which you can buy at $100, and has 128 GB in it. That is about half the price of an iPhone 6 with 128 GB, so if you really need space on your smartphone, then the Samsung GS5 is the winner!

GS5

Performance: When they wrote it on paper, it seemed that the Samsung GS5 is much better. However, when you try it out yourself, you will find that the iPhone 6 is much better and slicker. It is faster and much better than then the Samsung GS5, and will be used more often. Also, the finger-sensor on the iPhone 6 tops the one on the GS5 by a mile, so it looks like the iPhone 6 won this round!

iPhone6

The WInner!: It was a tie! However, if you are looking for a much less pricey and lots of battery life, the Samsung Galaxy S5 is the one to buy. However, if you are looking for a slick phone with awesome software and apps, go for the iPhone 6! But, if you were going to get me a smartphone for Christmas, then I would definitely want the iPhone 6, because it is the latest fashion and has all the top-rated apps. If this blog helped you out at all, be sure to leave a LIKE! If there is anything I missed or you want me to include, then just tell me in a COMMENT down below! And be sure to give me a FOLLOW, I post about tech every Monday, Thursday, and Sunday! See you guys in another blog!

Want To Buy The iPhone 6!:

https://www.apple.com/iphone-6/

Want To Buy The Samsung Galaxy S5!:

http://www.samsung.com/us/mobile/cell-phones

The designer of Apple products is named Jony Ive, and he is interviewed here, check it out at this link:

http://www.theverge.com/2014/10/18/6999931/watch-jony-ive-explain-apples-design-process-in-a-rare-public

Top 5 : Pokemon Video Games! [NDS/GB]

After playing some online Pokemon games, maybe you want to play some real ones for yourself. So how about I tell you about 5 of the best Pokemon games, made for the Nintendo DS and the GameBoy!

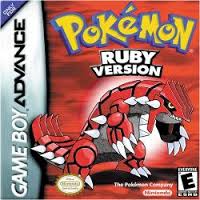
5. Pokemon Ruby – Number 5 on this list, Pokemon Ruby has some pretty cool features, like hidden bases. It is mostly about Team Magma trying to catch a legendary Pokemon known as Groudon, and it is your job to stop them. This game takes place in the Hoenn Region. Of course, it is similar to a lot of Pokemon games, with the same 8 badges you need to collect, and the Elite Four that you need to fight. Also, the strongest of all these trainers will be Steven, who resides in a cave after you beat the game. This game is on a GameBoy Advance!

Ruby

4. Pokemon Crystal – Number 4 on this list, Pokemon Crystal is fun, the early version of HeartGold and SoulSilver. It takes place in the Johto Region, and is Generation 2 of the games. It was thought to be the last updates, but they continued on and are now on Generation 6. In this, you are fighting Team Rocket and their plans to take over the world. Later in the game, you find out that your rival is the son of Giovanni, or Team Rocket’s leader! The legendary Pokemon of this game is Suicune, and it is your job to protect it, then capture it! It is played on a GameBoy Color!

Crystal

3. Pokemon FireRed – Number 3 on our list, this ever popular game is a remake of Pokemon Red. It is based upon the Pokemon Charizard, a fire-breathing dragon. The gameplay is fun and the graphics are original. You, again, are fighting against Team Rocket, to try to stop them from conquering the world! It takes place in Kanto Region. It is Generation 1 of the Pokemon games. You can play it on a GameBoy Advance.

FireRed

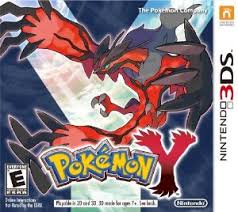
2. Pokemon Y – Number 2 on our list, this Pokemon game has to have the best-looking graphics I have ever seen! It is based upon the legendary Pokemon Yveltal, or the bringer of death. In this game, you are fighting Team Flare and their leader Lysandere, before he can destroy everybody that is not a part of Team Flare! This game takes place in the Kalos Region. It is Generation 6 of the Pokemon games. You can play it on a Nintendo 3DS.

Y

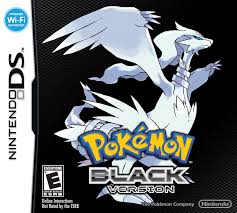
1. Pokemon Black – Number 1 on our list, Pokemon Black is at the top merely because it has the most heart-breaking, amazingly written story of ANY Pokemon game. It focuses on a trainer named N, who had been isolated from humans and with Pokemon his whole life. He believes that all Pokemon should be free, and not held “captive” by their trainers. He and Team Plasma will try to stop you, but you must beat them back and win! The legendary Pokemon of this game is ironically Reshiram, because he is white all over, and the name of the game is Pokemon Black. It takes place in the Unova Region, and is Generaton 5 of the games. You can play it on a Nintendo DS.

Black

Anyways, I hope this blog post has helped you guys out! If it did, be sure to leave a LIKE. If there is any tips you have for me, or any good games that I missed, tell me in a COMMENT. And don’t forget to FOLLOW me for all my blogs, I post every Monday, Thursday, and Sunday! See you guys in another blog!

PicMonkey.com – Website Review!

Just what everybody needs, an online “photo-editor made of win!”. That is how this website known as PicMonkey chooses to describe themselves, and boy, are they right! As I mentioned in a previous blog, photo-editing is a tool that EVERYONE needs and uses for all internet businesses, mainly because it makes them look professional. So I will be reviewing this website to you guys, and see what you think and how you can use it! The categories for this review will be purpose, design, content, and my opinion and rating, so keep reading to discover the truth about this website!

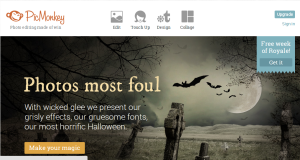
Purpose: It seems to me that PicMonkey is VERY effective and useful! It has a purpose, which it clearly states as soon as you open the page, it is an online FREE photo-editor for all to use. It does also have a Royal feature for those who want more, however it is paid, but most everything else is fine and working. Again, a clear purpose and solid tools.

Screenshot 2014-10-23 at 11.36.34 PM

Design: PicMonkey has an AMAZING and GRAPHICAL design, showcasing cool creations you can make with, as well as easy click-on bars and awesome eye-catching designs, it is very evident that they put a LOT of work into making this site look really good, and it worked! That is one feature that will definitely attract MUCH more viewers!

Screenshot 2014-10-23 at 11.40.30 PM

Content: The content in this site is VERY appreciative and easy to UNDERSTAND! It is useful, and built exactly for what you want the website to do for you, photo-edit! I think the content is AMAZING and that this designer and creator really put effort into this website, it meets up with all my standards and deserves a great rating!

Alright, so now let’s get to the rating! I would give this a 10/10, or a PERFECT score! I know, you might call it ridiculous, but I really cannot find anything bad or wrong about this site, everything 100% works and easy to understand and get started with right away!

If this review helped you at all, and you want me to do future reviews, be sure to leave a LIKE! If there is any information I have missed or questions you might want to ask, be sure to ask me in the COMMENTS below! Don’t forget to FOLLOW me to get all my latest blogs, right at your front door!

Check Out This Website For Yourself, It Really is Amazing! (10 out of 10)

http://www.picmonkey.com/

For future PicMonkey TUTORIALS, leave a LIKE and tell me in the COMMENTS! See you guys later!

Wizard101 [MAC/PC] Game Review!

All the way back in 2008, a company known as KingsIsle Entertainment set out to create a game. They filled this game with wizards and other magical creatures, and for some totally random reason, named it Wizard101! Over the years, Wizard101 has gotten so popular that now THOUSANDS of people play it, and it was extended to Mac as well as the PC. I have played this game myself of course, and now I am going to tell you what I think about it in this game review!

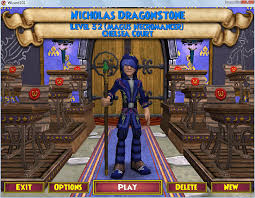
Graphics: The graphics to this game were fairly incredible, strongly resembling World of Warcraft, another ever popular game. They are complex and amazing, with eye-catching HD views. Definitely a bonus to this game.

wizard101

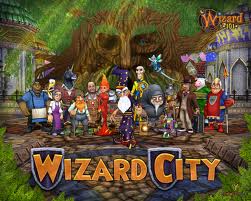
Music: There is a pretty decent music to this game, however it is not TOO loud, mainly because the characters are actually TALKING, instead of you just reading the text, another likeable feature! It has a piano classical, the kind to get you jumpy and excited, the PERFECT match for this game!

wizard101

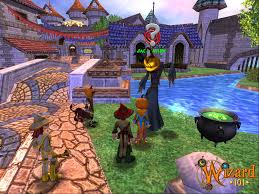
Cinematics: The action of this game is pretty smooth and swift. It is perfectly tuned in to the game, with EXTRAORDINARY maps and scenery to give you the most vivid and best gaming experience. Other than that, the cards in which you cast spells are very clear and easy to read, and the game itself is a LOT of fun!

wizard101

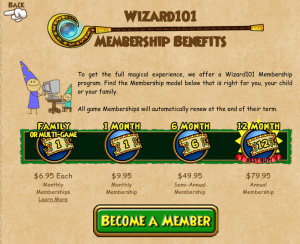
Story: The story of this game is pretty thorough and is okay in all relative terms. However, the story for this game is okay, however not good enough for a Let’s Play, mainly because all you do is attack monsters in every single stage. You battle a certain number of monsters, and then end the quest. After a while, this gets insanely boring, but that is not the worst part. You can only play for a certain amount of time (and not very long), before membership is REQUIRED to continue on with the story! If you are not willing to pay $10 a month, you are pretty much stuck.

Screenshot 2014-10-20 at 10.35.14 PM

When I give this game a score, it would be ONLY a 6/10 or a 7/10. Why? Well, everything in this game was AMAZING, well, everything except for the story. If that could be fixed up, I’m sure this game would get thousands more players and not just stick at a small level just because you are forced to pay. However, if you do want to play (which is free), then be sure to download the game using this link, it works for both Mac and PC, however NOT Linux yet!:
https://www.wizard101.com/game/how-to-download

Click on Crossover Games if you cannot find the link for the Mac game as well!

If this article helped you out, be sure to give it a LIKE! Don’t forget to COMMENT any other feedback that you have about the game that you want me to put in the article! Be sure to follow me, I post new blogs every Monday, Thursday, and Sunday, about Tech : How-To’s, Game Reviews, & More! See you guys later!

Want to Watch My Let’s Play of Wizard101?:

How To : Get Minecraft [MAC/PC] With Multiplayer FOR FREE 1.8

Blocks and blocks, scattered all around the world! What other game could come to your mind but Minecraft! This blocky video game has become one of the most desired around the whole world! Unfortunately, that brings the price of the game up ALL THE WAY to $27 just for the game! However, people like me do not feel like paying this much money for the game. If you have that kind of problem, you have come to the right place! In this tutorial I will be showing you the EASIEST way to get Minecraft 1.8 FREE with MULTIPLAYER. I will also be showing you a VIDEO tutorial to make it even easier! Keep reading to find out how!:

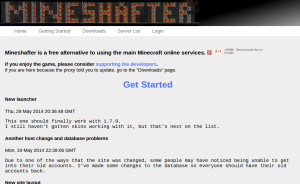
Step 1: For the first step, you are going to visit this link:

http://mineshafter.info/

Screenshot 2014-10-19 at 8.12.13 PM

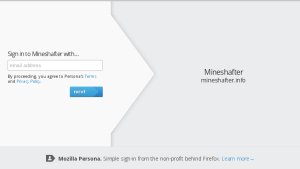
Step 2: Now that you are in the Mineshafter website, you have to Login with an email address, it WILL use Persona so beware make sure it is a real address too!

Screenshot 2014-10-19 at 8.13.20 PM

Step 3: Head over to “Downloads” and download the latest version. If you get it as a .zip/.rar, make sure you have Java installed. However, once you open Mineshafter-launcher.jar, you will get the Minecraft screen and you are almost good to go!

Step 4: It will ask you to log in, however you can use ANY username and ANY password, it will accept anything!

If you followed these steps, you should easily be able to start Minecrafting! If this helped you out in anyway, please leave a LIKE! Don’t forget to COMMENT if any info was incorrect, or needed to be UPDATED. Be sure to follow my blog for more How-To’s, Game Reviews, & More!

Want To Check Out A VIDEO Tutorial!

Hope it helped! See you guys in another blog tutorial! Don’t forgot to TELL me what I should do next in the comments below! See ya!

SkyDrive vs Google Drive | Which Cloud Storage is Better?

The long, unanswered questions that many writers and presenters often ask: Should I use SkyDrive, or Google Drive? Which one is better? Well, now I am going to answer your questions, going over the pros and cons of both cloud storages, and let you decide which one is better, as well as my own opinion on the matter. We will be going over some key points such as space, tools, features, and education/other uses in order to decide which is the BEST cloud storage!

Storage:

In storage, both of them have a decent amount of space, yet there is quite a significant difference when you REALLY look at it. Google Drive comes in at top with 17 GB, while SkyDrive tries to rival at with 7 GB. Obviously, it looks like that’s Google Drive: 1, SkyDrive: 0.

Tools:

For tools, I am going to have to have to mark SkyDrive as number 1. Why? Well, even though Google Drive may have some decent-okay tools, such as Google Docs and Google Spreadsheet, SkyDrive on the other hand has one of the best-selling and really professional products such as Microsoft Word, PowerPoint, and Excel! It also has a built in Skype with a long set of other tools useful in everyday life. That is going to make SkyDrive the best in this category, and that is going to make them both even-steven in this race for the best cloud storage

Features:

Google Drive and SkyDrive both have some pretty nice features to get you going and get you in FAST! Google Drive has ALSO just released what they called “New Google Drive”, and SkyDrive has just changed their name to “OneDrive”. However, it is more known by SkyDrive as in the making of this article. Anyways, both are equipped with a search bar to help you find documents easier, except that Google Drive has the ability to view documents more quicker with the fact that it supports almost ANY file type, and you can store almost anything. Whereas SkyDrive takes a bit longer because it supports mostly only file types of its own kind, not really any other small kinds of files. So that is going to put Google Drive in the lead! For now..

Education/Other Uses:

Google Drive has recently came out with two new features, Google Classroom and Google Apps for Education. Both have been HIGHLY recommended by teachers and been recognized constantly, because they let you push documents to your students without all that sharing nonsense, and gives you 30 GB space for all the school work you ever need to put in! In other uses, however, SkyDrive is going to be better quality and more suitable for business and personal reasons because of its online Skype as well as the added tools to make amazing looking documents and presentations.

The Winner!:

Who won? It is for you to decide! Both have their pros and cons. But in my personal opinion, I am in favor of Google Drive. However, this is for you to decide! If you really want a good one, use both! That is already 24 GB of free online space, and many tools and features for you to choose from! Best of all, its free! If their is anything I missed out in, be sure to tell me in the comments! And leave a LIKE if this helped you out as well!

Check out Google Drive for yourself!:

https://drive.google.com

googledrive

And don’t forget about SkyDrive!:

https://onedrive.live.com

skydrive

Hope this helped, be sure to follow me for all my future blogs if it did! I blog every Monday, Thursday, and Sunday! See you guys later!

How To : Download and Use Adobe Photoshop CS6 FOR FREE! [Mac Version]

We all have our reasons to want to photo-edit. Maybe you are professional, and willing to pay the $50 per month for this fantastic editor. Or maybe you are like me, editing just for fun and other personal reasons. Well, in this tutorial, I will be showing you how to get Adobe Photoshop CS6, for free! However, this is for Mac and not for windows, but I will show you how to do it in Windows as well, maybe in another blog tutorial. Before I get into things, you probably want to know what Adobe Photoshop CS6 is? Let us run-through it, just to give you a basis of understanding if you do not know already. In a nutshell, Adobe Photoshop CS6 is a fast, fun, and professional photo-editing tool used by many people for their editing needs. It is one of the best and has a HUGE variety of tools and features to make your photo look amazing. Many people in the BIG BUSINESS departments use Photoshop as well because it is one of the best. Of course, nobody wants to pay $50 a month for this wonderful tool, so I will be showing you how to get it for free!

Step 1: Download the Creative Cloud Installer from this link below, you will have to make an account if you haven’t already, so be prepared for that. Go in and click the Free Trial button, located next to the Buy Now button.

http://www.adobe.com/products/photoshop.html

Step 2: After you download it, you will have to install it then select which trial you want to use. Click the one at the top saying “Photoshop CC”. And don’t worry, Photoshop CC and Photoshop CS6 are the SAME thing.

Step 3: After Adobe Photoshop is installed, it will say you have a 30 Day Trial. If it doesn’t, you are good and fine but heed the next step carefully anyways.

Step 4: When your 30 days are over, if you are on a Mac it does not really end. Make a NEW MAC ACCOUNT, specifically for Photoshop, because you can still upload files and move files from other users too. Call the account Photoshop, and after 30 Days are up on THAT one, delete it and make a new one. Every time you do, it gives you 30 MORE days, so your time with this awesome editor is INFINITE.

{There are other ways, so some might be ILLEGAL, however it is still working and VERY hard to trace, however be known that there are SOME risks, though very small, since THOUSANDS have gotten away with it :)! Yeah}

Please be sure to give this blog a LIKE if it helped you out! Also, if any of the steps above did not work, or a VIDEO tutorial is needed, be sure to tell me in the comments. A tutorial for Windows is coming out soon, but in the meantime, enjoy editing!